How To Host a Cheap WordPress Website On Amazon LightSail

Deploying a WordPress site on Amazon Lightsail offers numerous benefits, including easy setup and management with pre-configured templates, automatic backups, and monitoring. With Lightsail, users can scale resources effortlessly, ensuring optimal performance and accommodating traffic fluctuations without the complexity of traditional AWS services.
It integrates seamlessly with other AWS tools, enabling easy expansion into a broader cloud environment when needed. Moreover, Lightsail provides predictable pricing, making it a cost-effective solution for running WordPress sites with AWS infrastructure and services.
Let's dive into getting your WordPress and a custom domain configured with your WordPress instance.
Create your WordPress instance
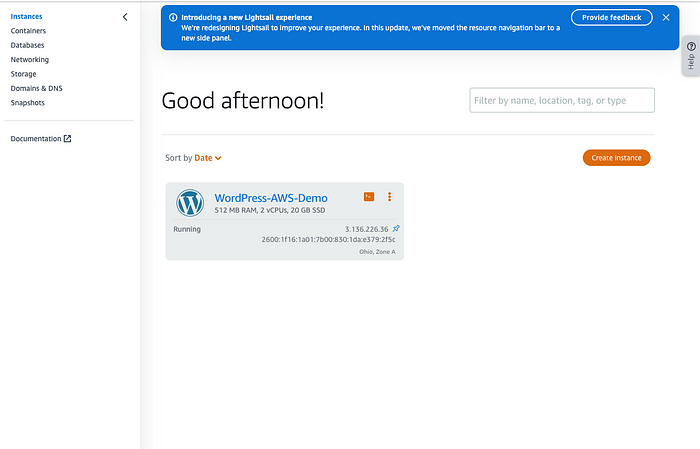
After logging into your AWS account head over to the Lightsail service and click on the "Instances" tab in the left navigation panel.
This will take you to a page that will show all your existing instances in LightSail.
Next, click "Create Instance"
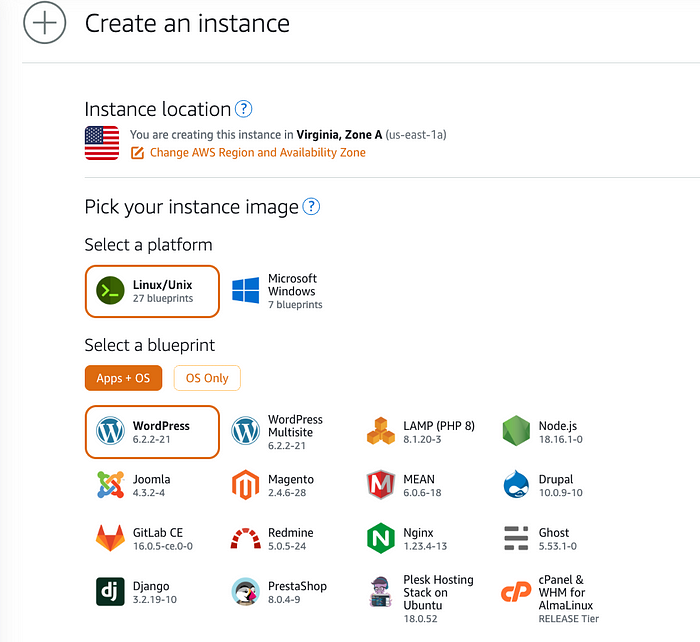
Select the AWS region of choice, but one is already configured for you automatically so you won't need to do anything there. Next, select the WordPress blueprint.
 ![[Screenshot 2023-07-26 at 12.27.21 PM.png]]
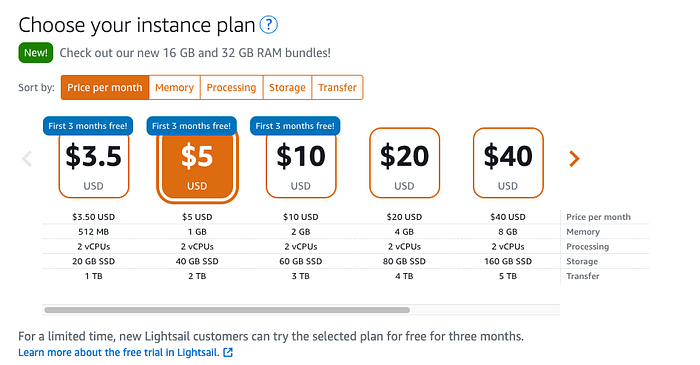
Next, you'll need to select a tier. Since this is only for demonstration purposes, you can choose the cheapest one, which includes a plan that's free for 3 months.
After selecting your tier, name your instance and then click "Create Instance". I would wait about five minutes before connecting via SSH
Once your instance is completely initialized, you can now SSH into your WordPress site by clicking on the 3 dots to drop the menu, which will show a Connect tab.
After successfully connecting to the instance, run the following command to retrieve the default password
at $HOME/bitnami_application_password
Next, go to the networking tab in Lightsail and configure a Static IP address.
We will use a static IP because we will get a different IP when our server needs to restart or shut down. StaticIPs ensure that we have a permanent address to send our website traffic.
Name and create your static IP
Once you create the static IP you'll be able to see the IP address used to connect to your instance. Now you will have to attach the static IP to your instance.
After that's complete, test the IP address by typing it inside the address bar in your browser. The link below will take you to your admin login page for your WordPress website.
http://<your-static-ip>/wp-admin
After that, enter in user for the username and the password you retrieved earlier when you executed the command in the SSH terminal.
Once you log in you should see your WordPress dashboard and from your static IP you should see a basic WordPress ready to go.
Enjoying the content?
Learn more about me and get access to exclusive content about software engineering and best business practices.
Subscribe